Tuesday, June 24, 2014

DIY Firework Headband for the 4th!

I am super excited about this diy, especially because I got to partner (again!) with an amazing diy company based in San Francisco called Darby Smart. This company is all about creativity and bringing out the designer in everyone.  Darby Smart sends everything in a kit, instructions included, so that you can simply begin crafting. Click here to be directed to this kit.

 I highly recommend Tulip brand's spray paint dye for all your quick dying needs. The sapphire blue went perfect with my little Lyla's denim dress. 

This is my most serious model face. I was testing lighting and my blue steel. 

I took lots of photos, especially since I was getting used to my new tripod. The headbands turned out perfect and this was my first coordinated photo shoot with Lyla. 


It must be very obvious that I am in love with my baby girl. More diy's featuring her in the future I'm sure. 
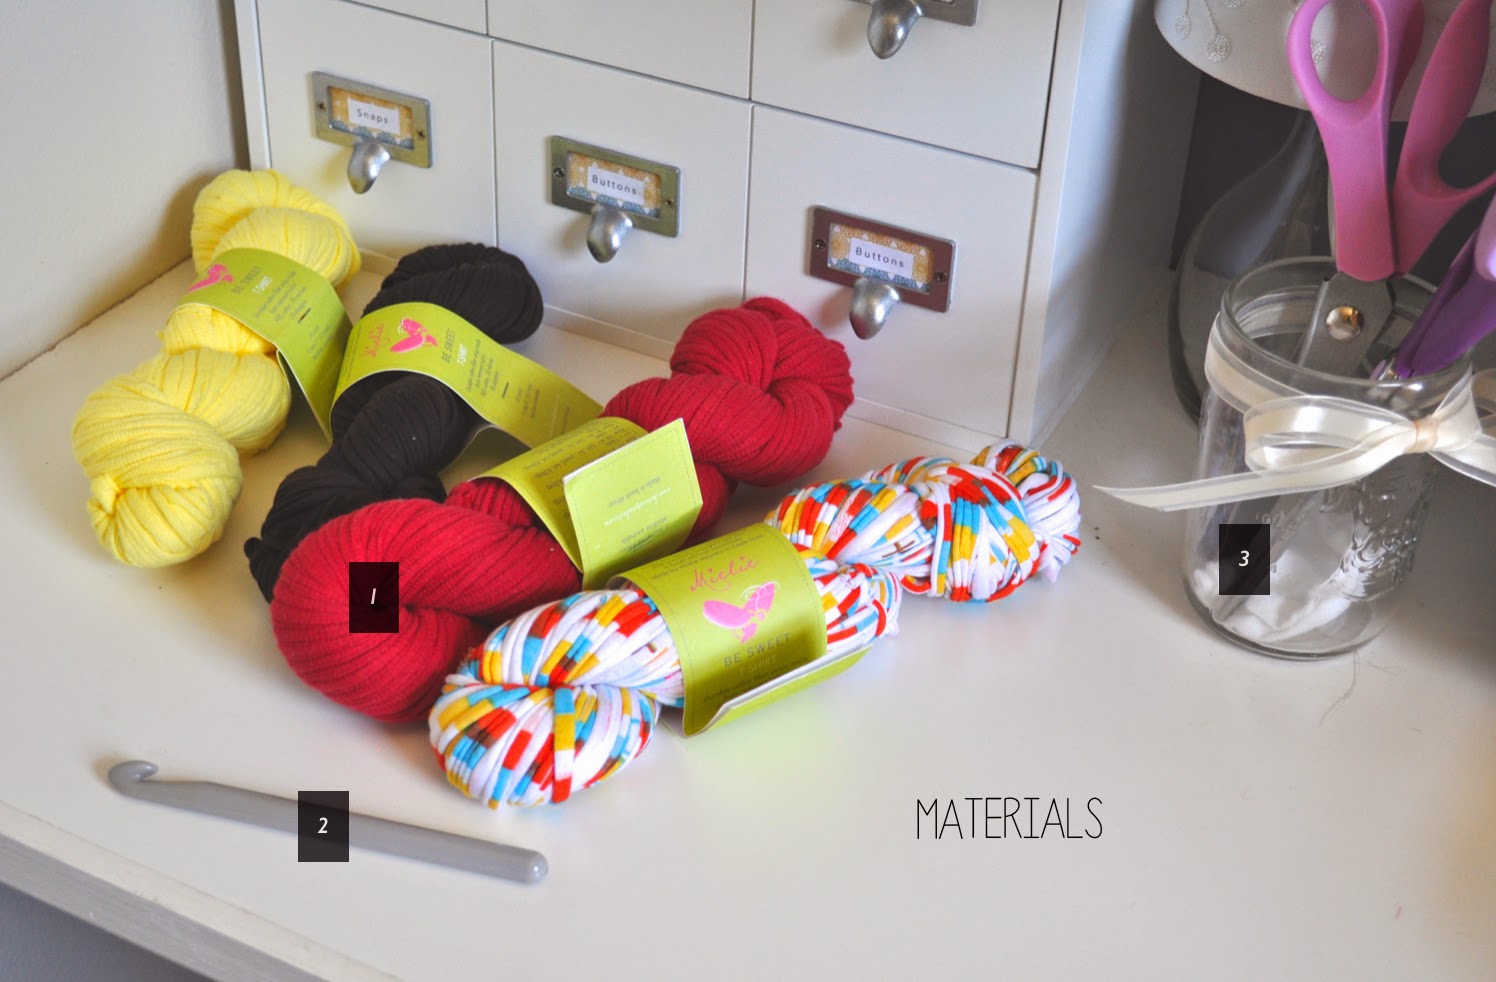
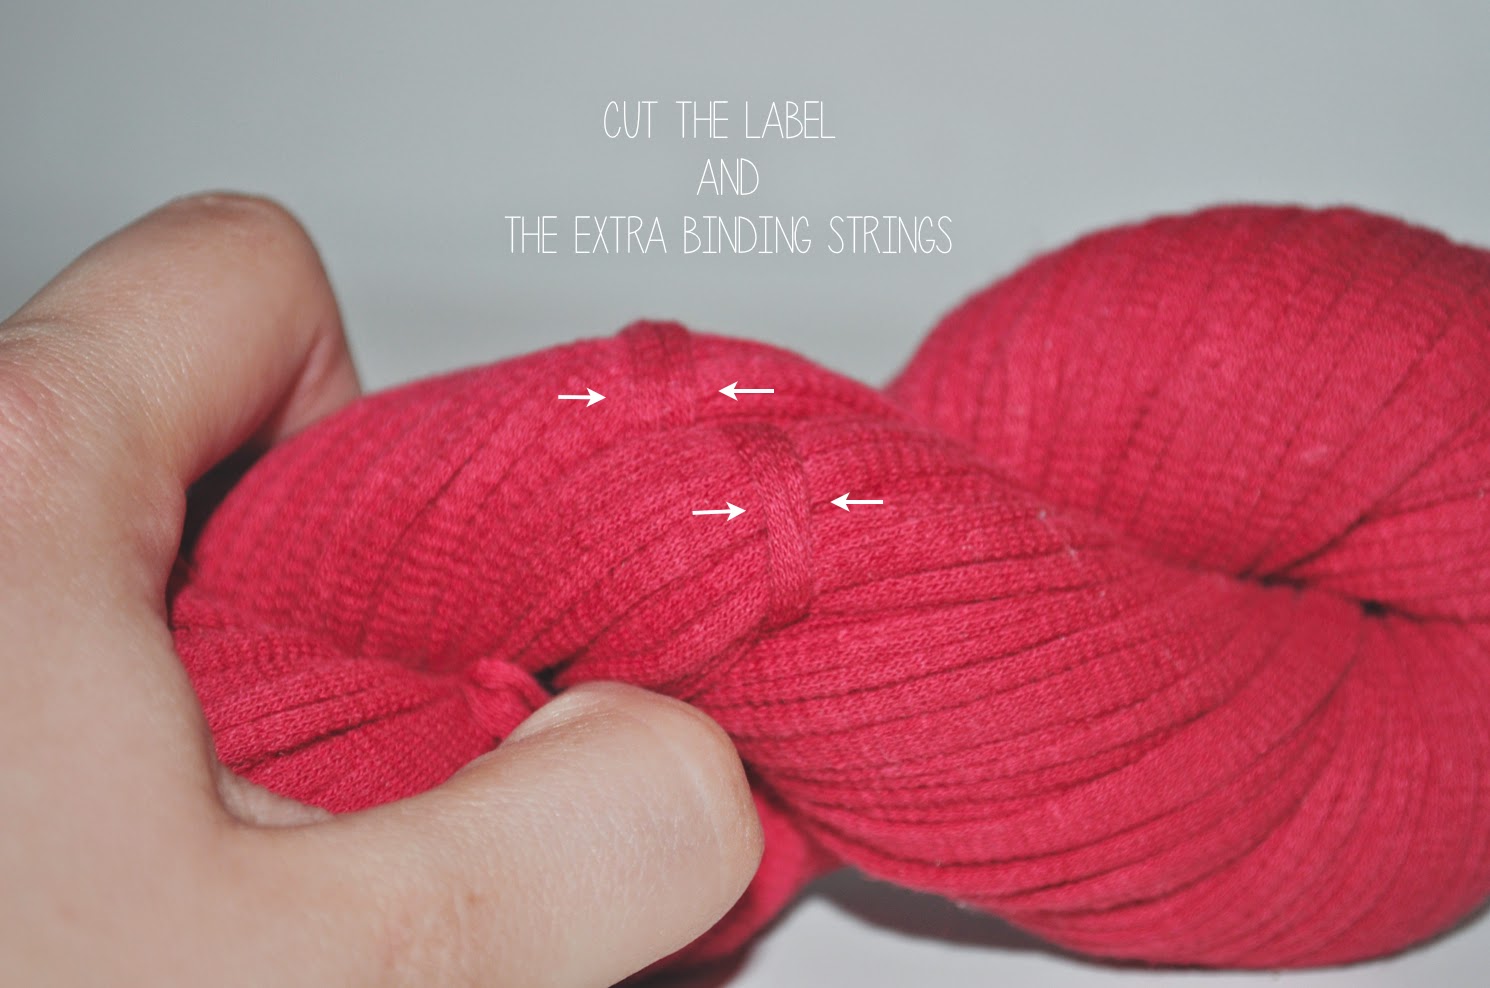

Materials:
1. Liquid stitch- this stuff is amazing. You can wash something after it's been glued and it will hold.
2. A hook or something to pull your headband through (fingers could work if you're dedicated)
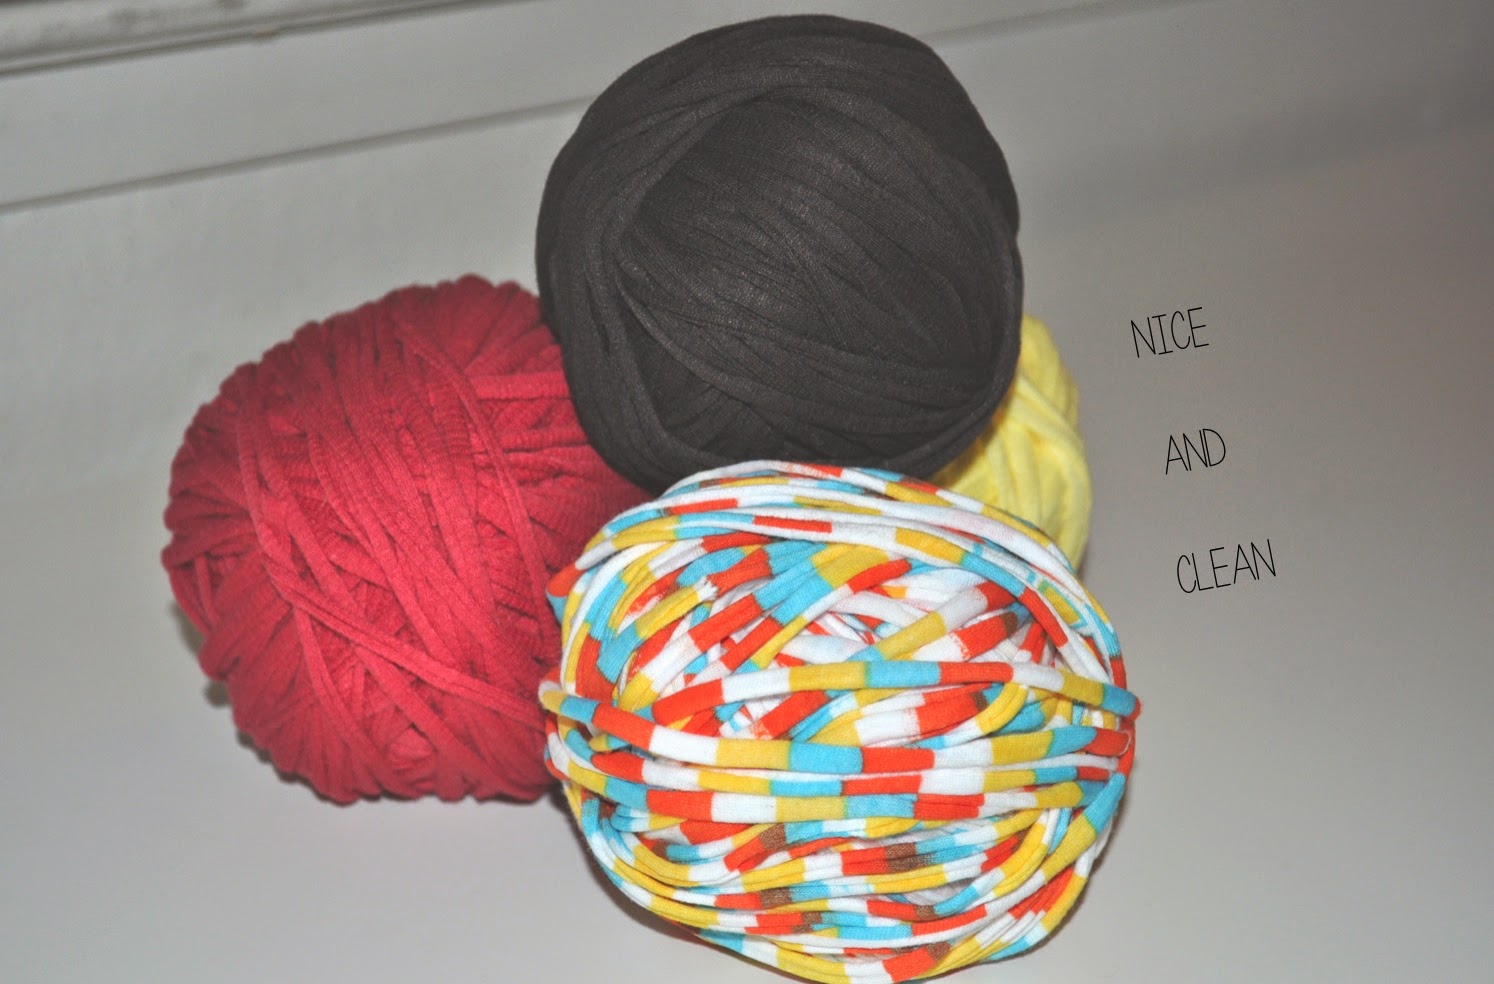
3. t-shirt yarn!
4. a handy pair of scissors
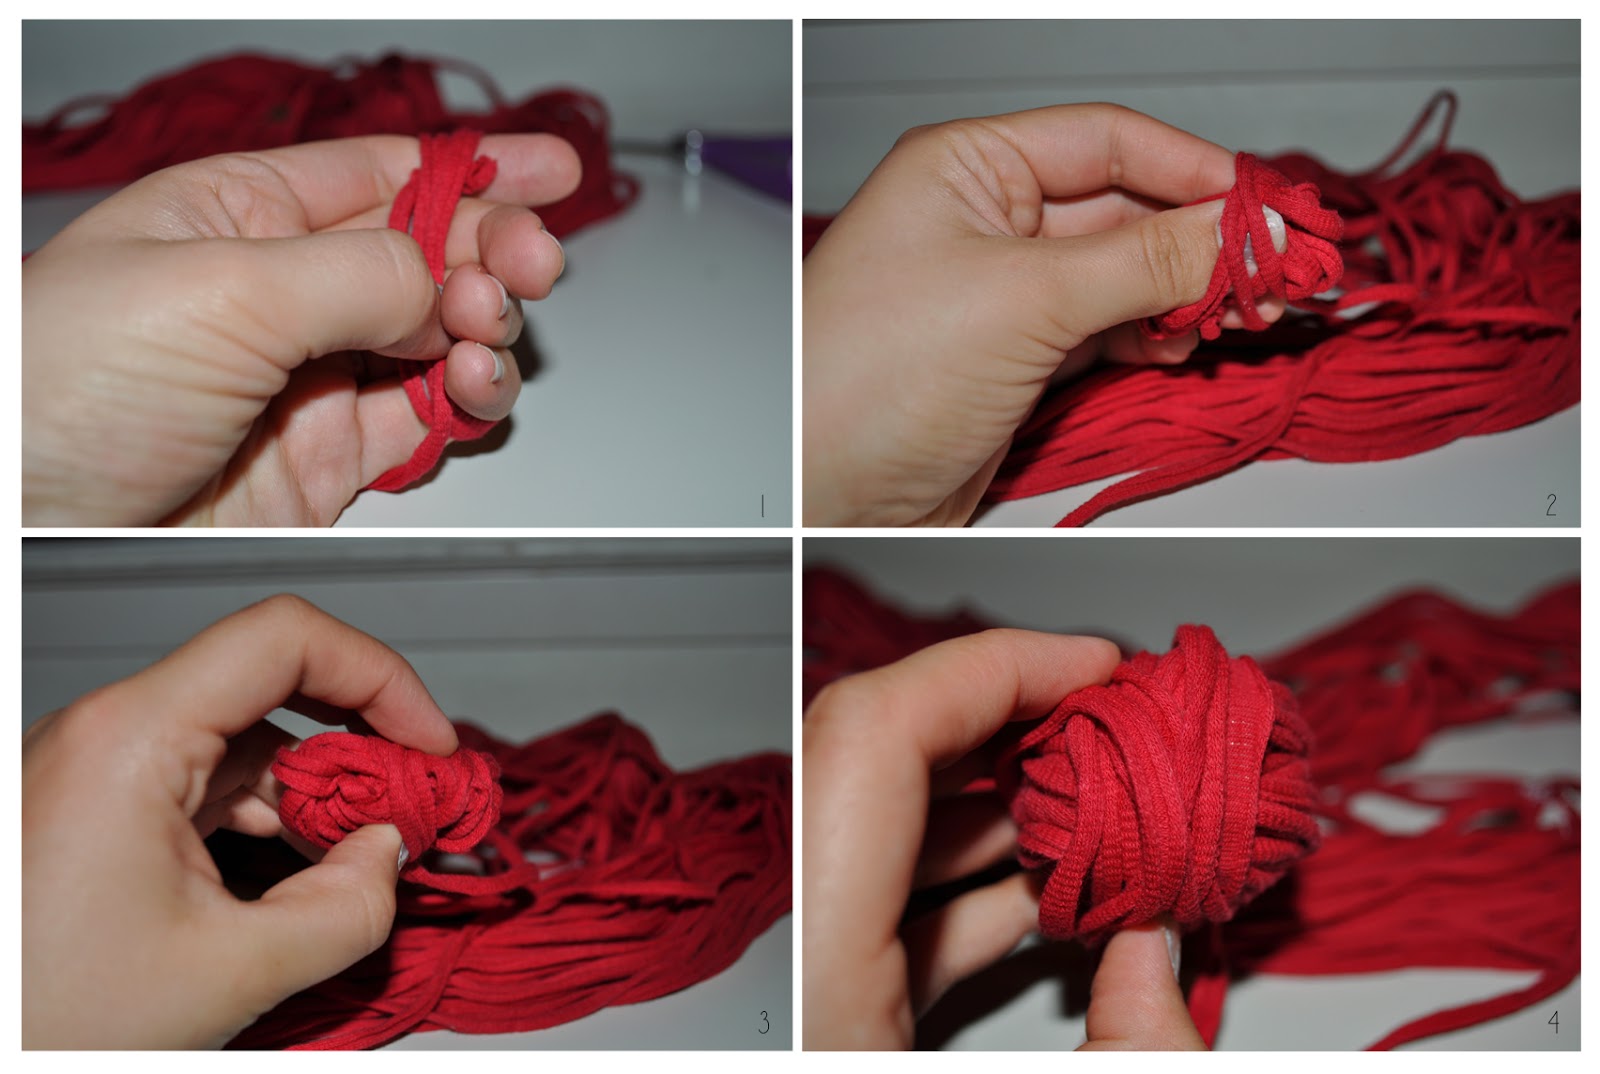
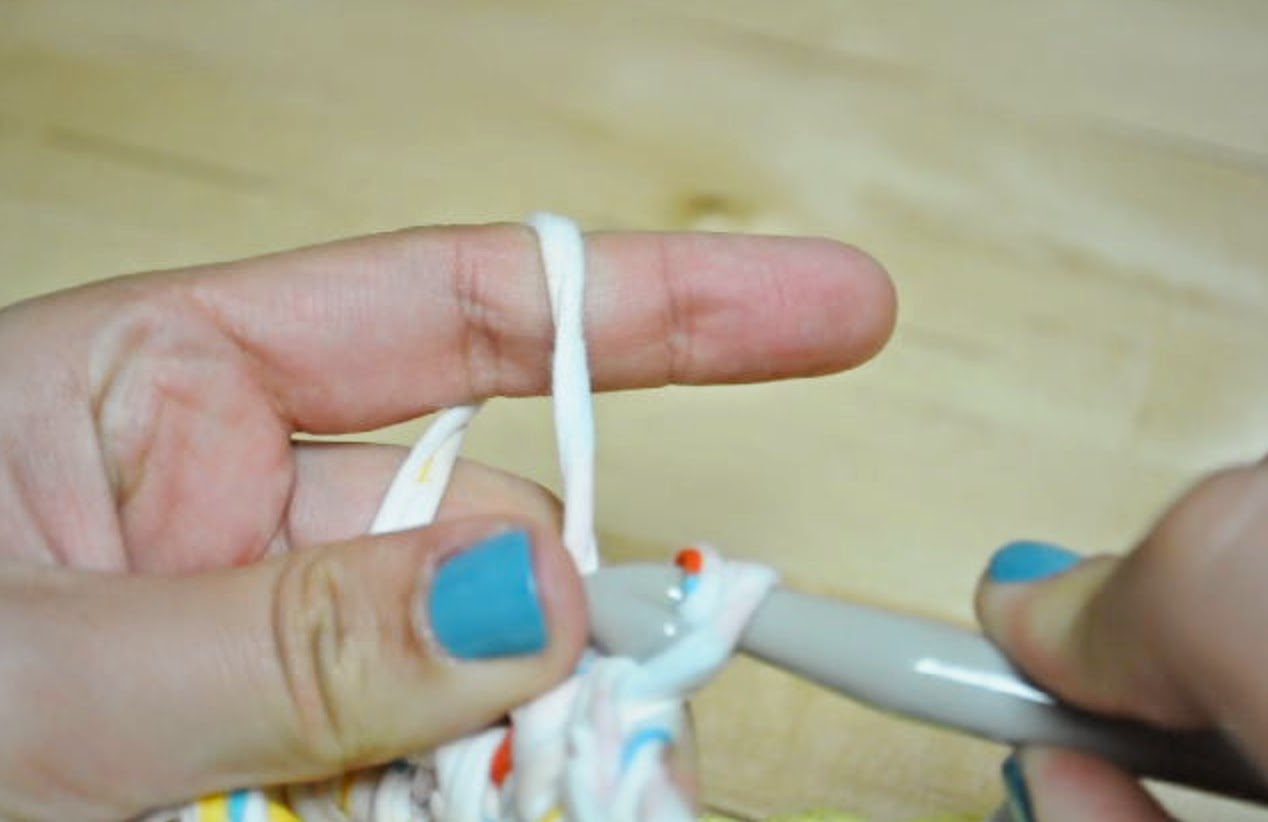
Step One:

Start by grabbing the end of your yarn and wrapping it several times around your four fingers. I found that wrapping over 20 times gave the poof more of an exploding firework kind of look. 


Step Two:

Once you have the desired amount of thickness to your poof go ahead and cut the end.

Step Three:

While maintaining the length of your rows carefully slip the yarn from your fingers.


Step Four:

Cut a small piece of yarn with one hand while still maintaing your loops in the other hand. This piece of yarn will be used to create the poof for your headband.
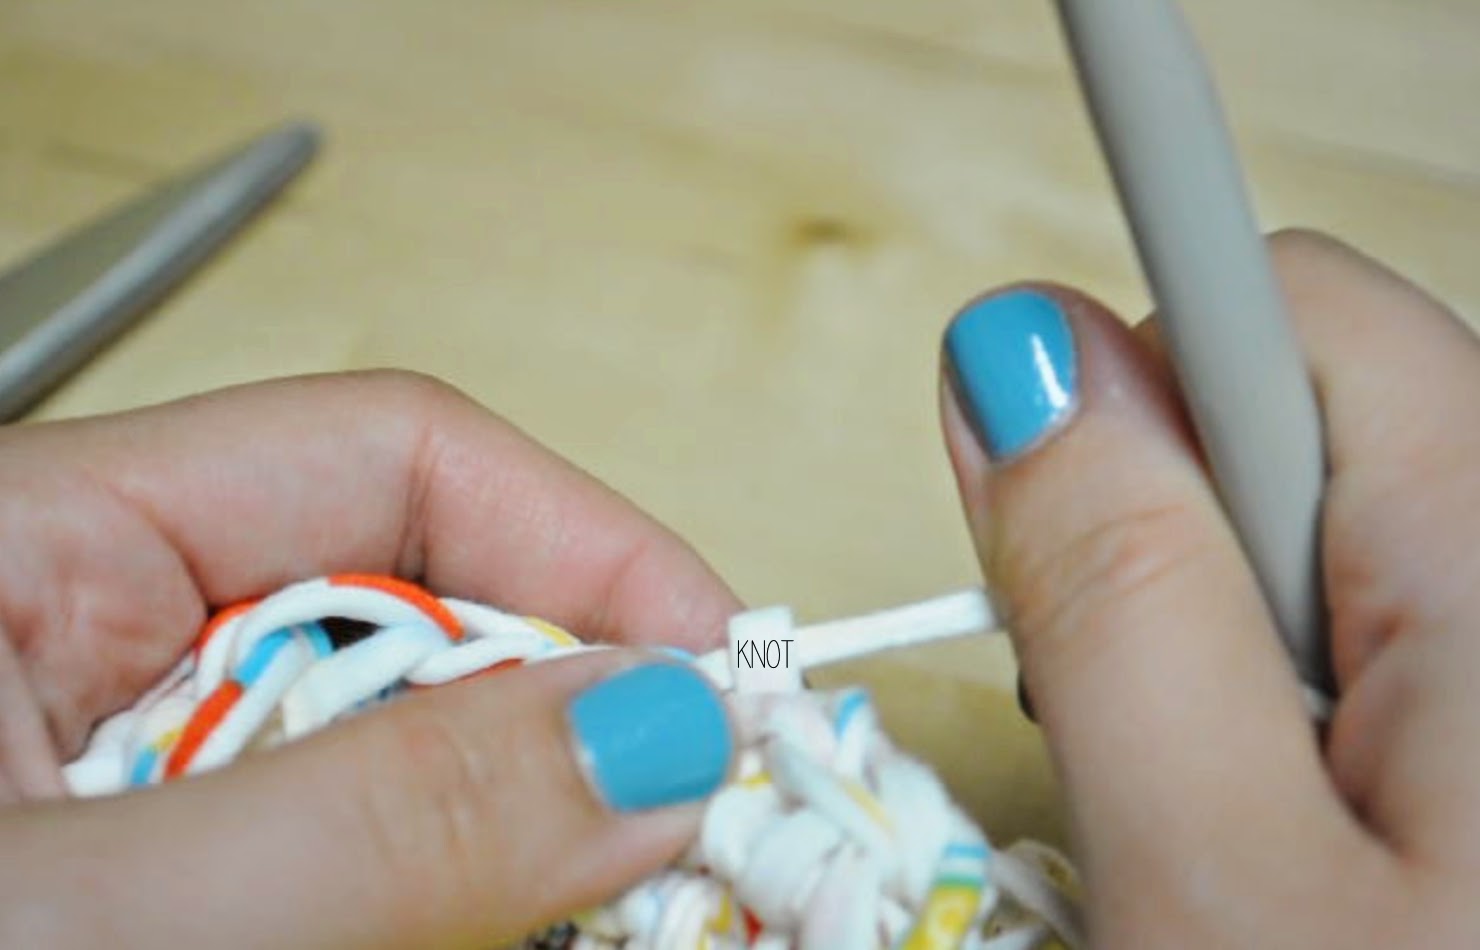
Step Five:

Now you don't have to worry so much about keeping those loops neat. Take that small piece of yarn and tie a knot, pull it tight, and then tie another knot.


Step 6:

This is the beginning of our lovely "explosion". Take your scissors and cut each end of your loops. I do this all at once so that they all have a nice even look. Make sure you're right at the top of your loops so that both sides end up even. 

Step Seven:

Fan it out! Move the tops of the strings in various directions away from the center knot. You can manipulate your poof into a fun firework shape. The underside should be more flat since this will be going against your head and will be the place that you attach the headband.


Step Eight:

Now it's time to make your headband. Measure your head. I simply wrapped the string around my head and gave an extra half inch to connect the ends together. I cut three strands for my headband since I prefer a thicker look.


Step Nine:

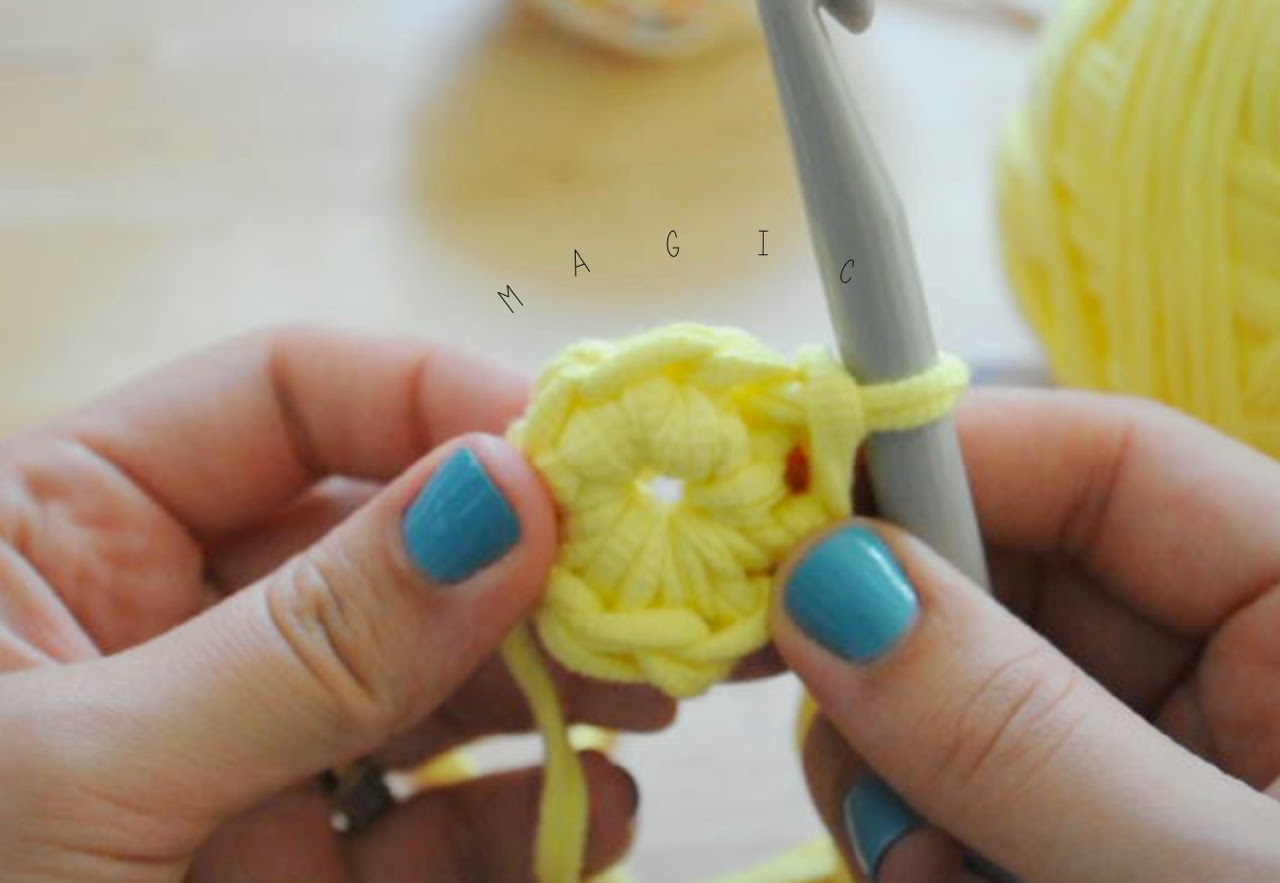
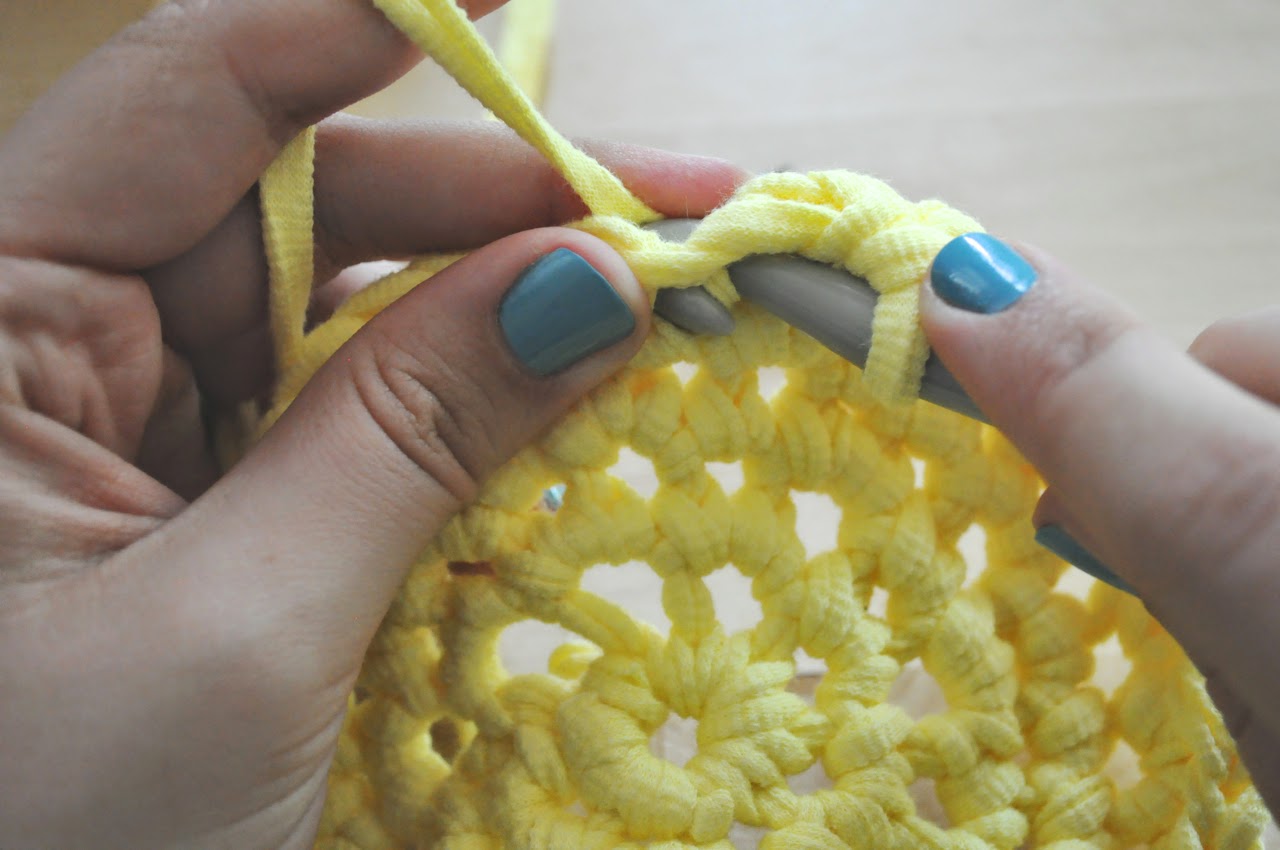
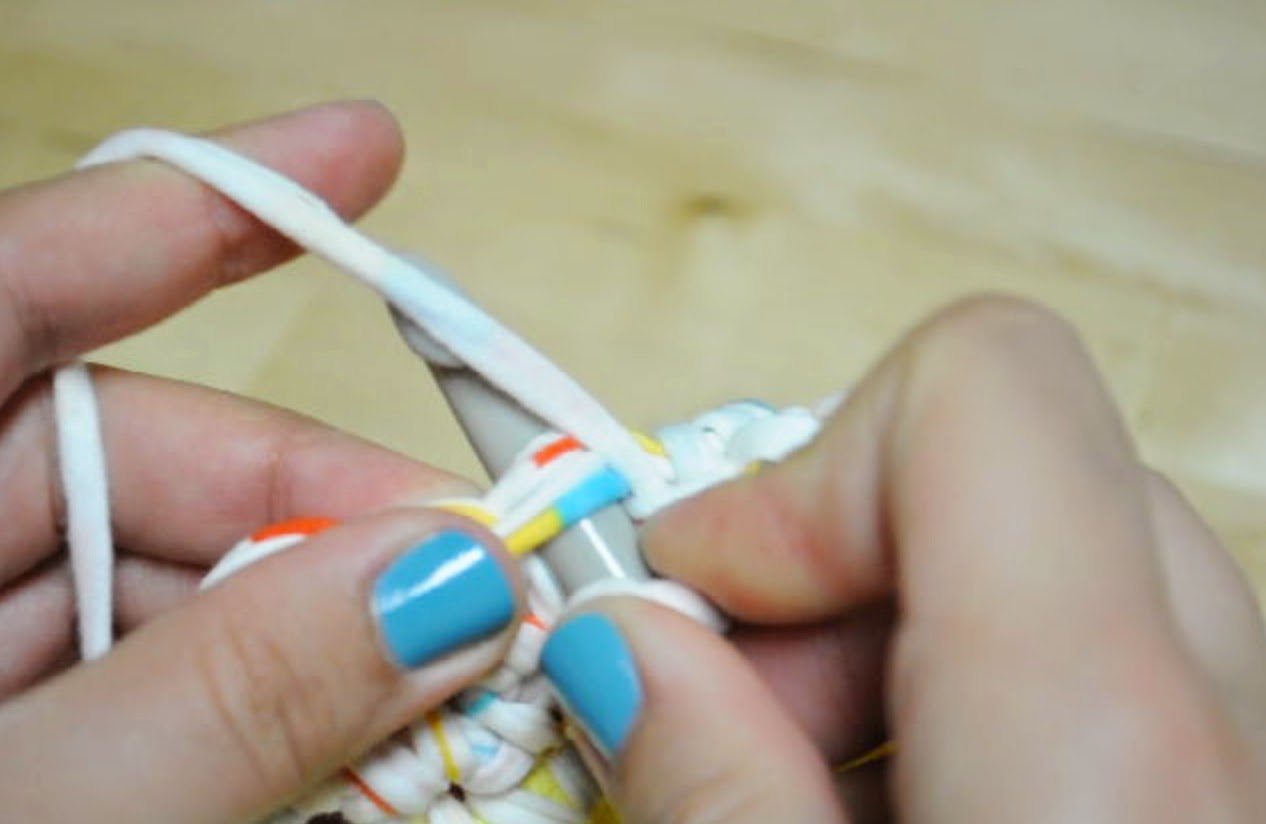
It's almost glue time! First we want to slip the poof onto the three strands. I used a crochet hook. You can also use your fingers but I'm all about efficiency when I have a nap schedule to attend to. 


Then hook the yarn and pull the desired amount through the loop. I picked three strands of yarn for my headband.

Step Ten:

Bring out the fabric glue! A common phrase we say in preschool is "dot dot, not a lot". A little bit really goes a long way here. First glue the ends together. Then cut a piece of yarn, about 10 inches give or take, and wrap it around your headband ends, gluing in place as you go. Take some time to let the glue dry a bit. I like to give mine an extra little loving squeeze to hold the glue in place.


Wrap and glue as you go!

And look at how lovely it all turns out!

Hope you enjoyed this tutorial!


Friday, May 2, 2014

T-shirt yarn headband tutorial and a Darby Smart GIVEAWAY!

Who doesn't love free stuff? And who doesn't love t-shirt yarn!? Seriously I'm addicted. Something I'm not addicted to is working out. Well, not yet, but I'm trying! I'm doing my best to love it but what's frustrating me lately is that my hair is constantly in the way. I like cute short haircuts because it's easier with the kiddos, but it can look interesting when you're trying to do some cool workout moves. Cue the cute headbands. I had some yarn left over from my crochet basket project that I decided to make a headband out of it. I loved it so much that I had to make more, especially for friends.
A week ago I blogged a diy tutorial on how to make crochet baskets from t-shirt yarn. I have been making things with t-shirt yarn ever since. I may even make a rug for our kitchen. This tutorial is super quick, and also includes a give away! If you win Darby Smart's giveaway, you'll be able to make a basket and if you have yarn left over you can even make a headband for free! Simply click on the link and type in your email. Good Luck! 

Now for the tutorial.

Supplies List:


1. t-shirt yarn!
2. Scissors
3. Extra fabric
4. Glue gun and glue
5. *Sewing machine is optional if you opt out of glue

Step One:

Cut 6 strands of yarn about one arms length for an adult headband. 

Step Two:

Make a ribbon shape with three pieces of yarn. If you were looking down at your yarn it should look like the picture below.


Step Three:

Lay the other three pieces of yarn on top of the ribbon in the shape of a smile.
Then tuck the right side of the smile under the right side of the ribbon.

Step Four:

Here comes the "tricky" part. First lay the left side of the smile underneath the loop of the ribbon.

Step Five:

Take the right side of the smile and weave it over the strands in the loop, under the left side of the smile, and over and out the other side of the loop.


Step Six:

Hold the ends—the top 6 strands in one hand, and the bottom 6 in the other. Pull towards the center.


Step 7:

Put the head band over your head and pull the ends to the back to measure the size you'll be making. 


Step 8:

Connect the ends either by gluing or sewing. I put a dab of glue right where the ends cross. Then cut the excess ends so that they'll easily be hidden. I like to cover the connected ends with a piece of fabric to make it nice and neat. I simply glue or sew down the sides of the extra fabric so that all the seams are closed. Roll and glue tight like a sleeping bag that will never reopen. If you're sewing, simply roll and then sew down the sides and across the middle of the strip of fabric.

Make sure all the ends are tucked into the middle of the strip of fabric and then glue and roll. I put a dot of glue every inch or so in the middle. Make sure the end is sealed tightly with glue.
Then you can wear it! This headband is so easy and fun to make. Hope you enjoy it!


Thursday, April 24, 2014

DIY crochet nesting baskets

I am so excited about this project. I love to crochet but I typically make projects at the end of summer or early fall since I love making infinity scarves and hats for the winter. This project is perfect for spring and summer. You can get all these materials for a sweet deal from a company called Darby Smart. Just click here. They are an awesome diy company based in San Francisco. Check out their website for some fun diy kits that you can make your own. I love the cute boxes that the kits come in. I wanted to hug mine when it arrived, but instead I took a million photos of it sitting in my craft corner. 


This is a photo heavy post because I wanted to make this tutorial beginner friendly. If you are a more advance crocheter, feel free to skip the videos. Hope you enjoy making these baskets!


Supplies list:
1. t-shirt yarn (you need at least 4 skeins of yarn to follow this project, 1 skein to make one basket)
2. N size crochet hook (10.0mm) 
3. scissors
4. stitch marker (recommended and optional)
I highly recommend using a stitch marker to count your rows. I have a really hard time paying attention. You can easily locate something around your house that will suffice for this project. I used a loose leaf ring but you could also use a piece of extra yarn or even a pretty earring! Just don't lose it if it's special to you. 

Step 1:

Once you've cut the strings your skein of yarn might look like this...


Step 2:

I wrote in my notes that this step is optional, but for me, it is necessary. I like to wind my yarn into a ball so that the yarn does not get tangled as I'm working with it. First you wrap the yarn around your fingers several times, then pinch the yarn that you wrapped with your fingers and continue to wrap yarn around, alternate the direction that you wrap the yarn so that the ball looks even all around. Keep wrapping until you have all the yarn nice and tidy. 


Step 3:

It's time to start with the magic ring! I made a video for this part of the project. If this is your first time making the magic ring it is easier to do after watching the video. This is a really handy thing to know how to do as a crocheter. It is especially important if you want to make a cute beanie or even little crochet flowers, more about those another time...

In the video below I single crochet 8 times in the ring for the large basket. 
*Single crochet 4 times in the ring if you're making the small basket.
*Single crochet 6 times in the ring if you're making the medium basket, or however big you want your basket to be!


Step 4:
Time to increase!
After you make the magic ring, chain 1.


Then single crochet two times in every stitch around. This is the one motion you will really need to know how to do for the entire project.
Here's my pattern for the different bases of the baskets:

*small basket: 4  in the ring and increased the base 4 rounds,
1st round:8  2nd round:12  3rd round: 16  4th round: 20

*medium basket: 6 in the ring and increased the base 5 rounds,
1st round:12   2nd round: 18  3rd round: 24    4th round: 30  5th round: 36

*large basket (pictured): 8 in the ring and increased the base 5 rounds,
1st round:16  2nd round: 24  3rd round: 32  4th round:40  5th round: 48

A note about increasing. Do you see the pattern? The first number of stitches is doubled in the first round and then you add the beginning number of stitches to the doubled number. So, I started with 4, increased by that number, and then just added the beginning number of stitches so 8 + 4 =12! And I don't even like math all that much.

Here's how we get to those numbers. After making your magic ring, chain one, and then single crochet in each stitch twice all the way around the circle, slip stitch into the first stitch to join and then chain one to move you up to round two.

Increasing round two: *single crochet in the first stitch and then single crochet in the next stitch twice* repeat from * until you come back around to the first stitch. You should have increased the number of initial stitches, (if you started with 4, you doubled that in the first round (8), and now have 12 after round 2) Slip stitch and chain 1.

Increasing round three: *single crochet in the first and second stitches and then single crochet twice in the the third stitch * repeat from * until you come back around to the first stitch, slip stitch to the first stitch and chain 1. (Are you noticing the increase pattern?) You will now have 16 if you started with 4.

Increasing round four and beyond: *single crochet in the first, second, and third stitches, and then single crochet twice in the 4th stitch * repeat from * until you come back around to the first stitch, slip stitch and chain 1. Whatever round you are on that's the stitch you will be doing two single crochet stitches in. So if it's round 5, do two single crochets in stitch 5. Keep going until you love the base size of your basket, or if you would like to make nesting baskets like mine, then follow the pattern above.

Step 5:
You have made your lovely base, and now it's time to start to create the sides of your basket. After chaining one at the end of your last increase round, simply single crochet all the way around and continue in this spiral motion until you like the height of your basket. *Mark your first chain 1 by inserting the stitch marker. Then you can count how many rows you did after your increase. *


* small basket sides: 3 rounds of red and 3 multi-color
*medium basket sides: 5 rounds of brown and 3 multi-color
*large basket sides: 6 rounds of yellow and 4 multi-color


Step 6:

*This step is optional if you want to add a splash of color to your basket or if you want to make a bigger basket.*

This is how you attach another skein of yarn to your basket. First you cut your working yarn, leaving room to weave in later, and let the tail hang behind your basket.
With the new yarn held loosely in your left hand and the tail of your first yarn left loosely behind your stitch, insert your crochet hook into the next stitch and yarn over with the new yarn and pull back through the loop. 

Yarn over with the new yarn and pull through both loops creating a single crochet with the new yarn. Both strings will feel a little loose loose since they aren't tied to anything yet. Tighten a little and leave both strings hanging. You will weave those in at the end. Keep going around until your basket is the desired height. Repeat this step if you want to do more colors!

Step 7:
Now that you've crocheted your basket to the desired height it is time to tie a knot and weave in the ends. You are going to slip stitch to the next stitch. When you come to the place where you want to end, insert your hook, yarn over, and pull the yarn through the loop that remains on your hook.

Cut the string and pull it tight.

Step 8:
You're almost done! Just weave those ends in to make your basket look pretty, then cut the excess yarn.
I like to weave my ends on the inside of my project. Using your crochet hook, pull the tails through different loops and tie a simple slip knot, I do the last part twice to make it extra secure. 
Trim the excess yarn and enjoy!